FCPX 10.4's Color Grading Tools Are a Game Changer
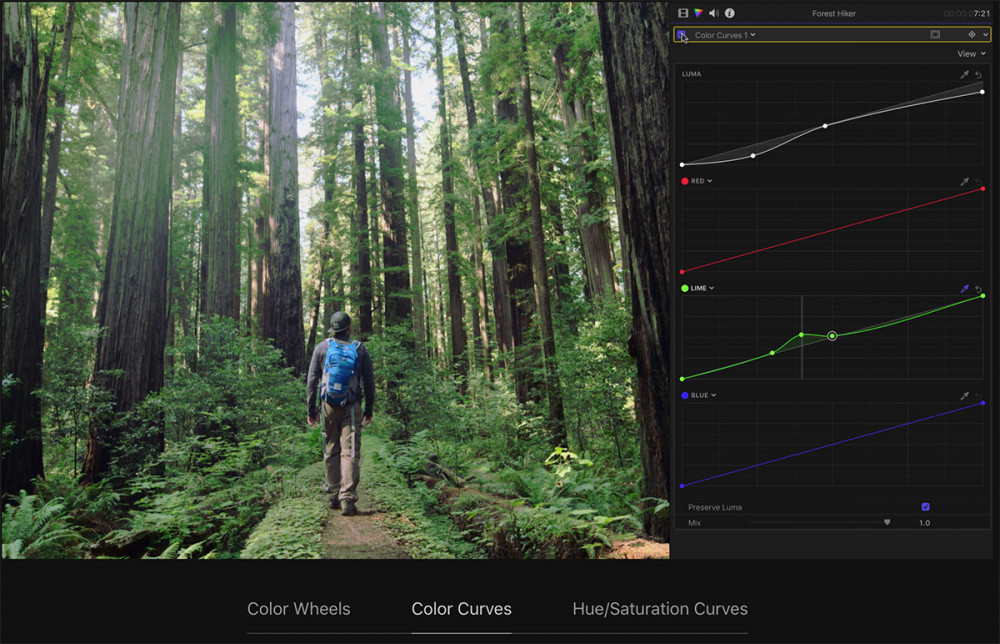
With the popularity of flat image profiles and the advent of HDR workflows on the horizon, adjusting color inside the NLE is more important than ever. With FCP X 10.4, you can do more with color (and do it more quickly and intuitively) than ever before. I’m going to walk you through the new tools and show you just how cool they are. Beyond the Color Board Final Cut Pro X has not been a stranger to color correction. Since its inception, Final Cut allowed you to color correct using a tool called the color board. The color board was initially built into a video clip, and by moving through various panes you could adjust the exposure, saturation and color of an image. A big problem with the color board was if you came from Final Cut Pro 7, had a background in photo editing software, or were familiar with professional color correction applications, the color board was quite foreign to you. Instead of the traditional color wheels, the color board represented the same information in a flat, horizontal field. There were pucks assigned to Highlights, Midtones, and Shadows that you could move up or down to adjust color, saturation or exposure as needed. While the color board is not a bad way to interact with a color, it didn’t follow the established color-correction paradigms. Another issue was your inability to keyframe a correction (although there was a way to cheat this by blading a clip and dissolving between 2 corrections). Now flash forward to December 14th, 2017 when Apple released Final Cut Pro X version 10.4. The most significant changes all had to do with color. If the changes for color could be summed up in one word, it would be flexibility. The options you have for working with color have been vastly improved and expanded with the addition of color wheels, color curves and hue and saturation curves. This article will take a look at these new additions and explain how you can use them with the help of existing color tools. I will also explain how you... Read more
Report
Related items: